Taking Screenshot on your Lenovo yoga
- Home
- -
- Taking Screenshot on your Lenovo yoga
<
script async src="https://pagead2.googlesyndication.com/pagead/js/adsbygoogle.js?client=ca-pub-5953224202278307"
crossorigin="anonymous">
Taking a screenshot on a Lenovo yoga is a straightforward process, with some basic steps, you can easily capture screenshot on your Lenovo yoga, steps are as follows:
Using the built-in screenshot tool:
- Press Window key + Print screen: This action will capture the entire screen and will save it to the picture library in screenshot folder.
- Press Window Key + Shift + S: It will open a snipping tool, which allows you to select any specific area you want to capture, of the screen.
Using the snipping tool:
- Open the snipping tool app on your Lenovo yoga, you can search for it by using search menu.
- Click "new" and select the type of snip you want to take such as: Free form, Window or Full screen.
- select the area which you want to capture with the mouse.
- Save the screenshot on your preferred location.
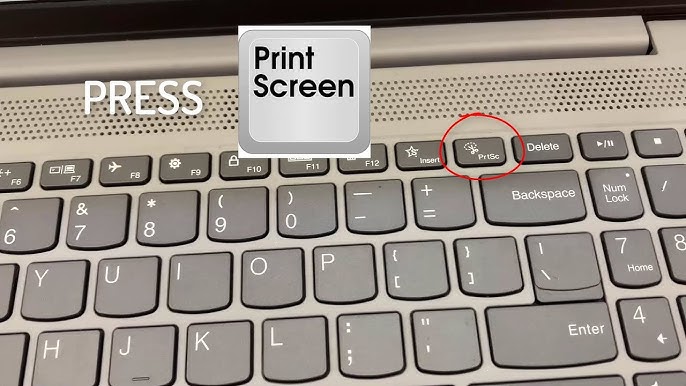
By Using the print screen key:- For capturing the entire screen:
- Press print screen, usually located on the top low of your keyboard.
- Open word or print or any other image editor
- Press Ctrl + V to paste that image there and save the file.
Press Windows + Print screen:
- For Instantly saving a full screenshot, press Windows + PrtScn
- The screen will flash
- you will get that screenshot in, File explorer < Pictures < Screenshot.
Bonus Tips:
- You can simply use any third party app or tool to take a screenshot on your Lenovo yoga.
- Some of Lenovo yoga have the specific feature or shortcut of screenshot, so check the documentation of your device.
- Follow these simple steps and take screenshot on your Lenovo yoga and share them with your friends and family or use them for your own future need.